Tuning
Downloadable articles (pdf flles):
Tweaking your Rooster Part 1 - Mast rake and shroud tension
Tweaking your Rooster Part 2 - Fitting out etc.
Velcro in dagger board case - Alan Gillard
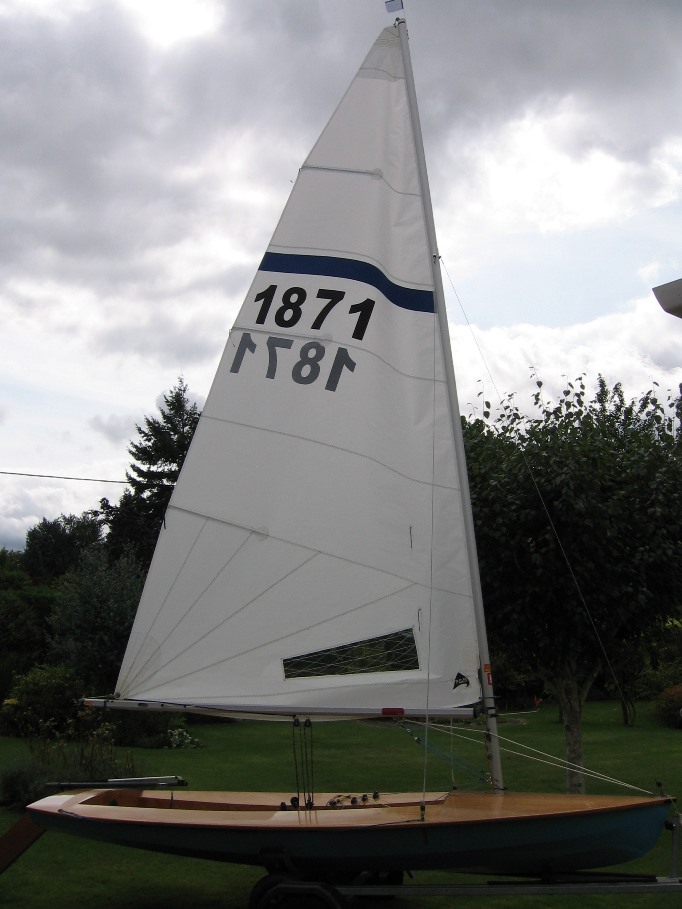
More track and traveller photos, courtesy of Gil Cumming (Streaker 1871) at Weir Wood.

‘Heads up’ on Track and Traveller Centremain by Alan Gillard
Track and Traveller Centremain can now be fitted to all Streakers, but there are a few things that need considering before you go bolting a track to your Streaker thwart. This article is primarily to make you aware of some of the reasoning around the rules and how best to fit and position the extra equipment to your Streaker if you are not buying new.
Rules. Have a read and digest the rules on Mainsheet System it is Item 10 in the Rules of Measurement and Construction. Specifically the rule for Track and Traveller Centremain is Item 10.03b & 10.03c
10.03b. Track and Traveller mainsheet system - The Track and Traveller shall be fitted to the thwart. Maximum length of track 610mm as per measurement rule 26a. Reinforcement of the thwart is permitted.
10.03c. Control lines for adjustment of the traveller car are optional.
The track must be fitted to the thwart.
The maximum length of the track is 610mm. Tracks from Harken are supplied 600mm long; a track from Allen Bros is 900mm long. You probably only need 450mm of track so cutting a single track in half from Allen Bros and sharing with your mate is probably the most cost effective.
The other reason for limiting the length of track was to restrict any advantage a Streaker fitted with track and traveller centremain would have over leech control on a reach. (Leech control could be controlled by mainsheet alone if the track went all the way from side tank to side tank).
Fitting the track should be relatively straight forward, but there are quite a few varieties of thwart. Curved upwards to meet the side deck and curved forwards, or straight and either Wood or GRP.
If you have a straight flat thwart the job is much easier as most boats will be wood so potentially you can either screw or bolt the track to the thwart, which ever you prefer. I am sure though that you may want to reinforce your thwart as fixed into your boat.
With the curved thwarts you will want to acquire a track which is bent to suit. Both Beer BY and Butler Boats have fitted their new boats with curved tracks. So tracks are available.
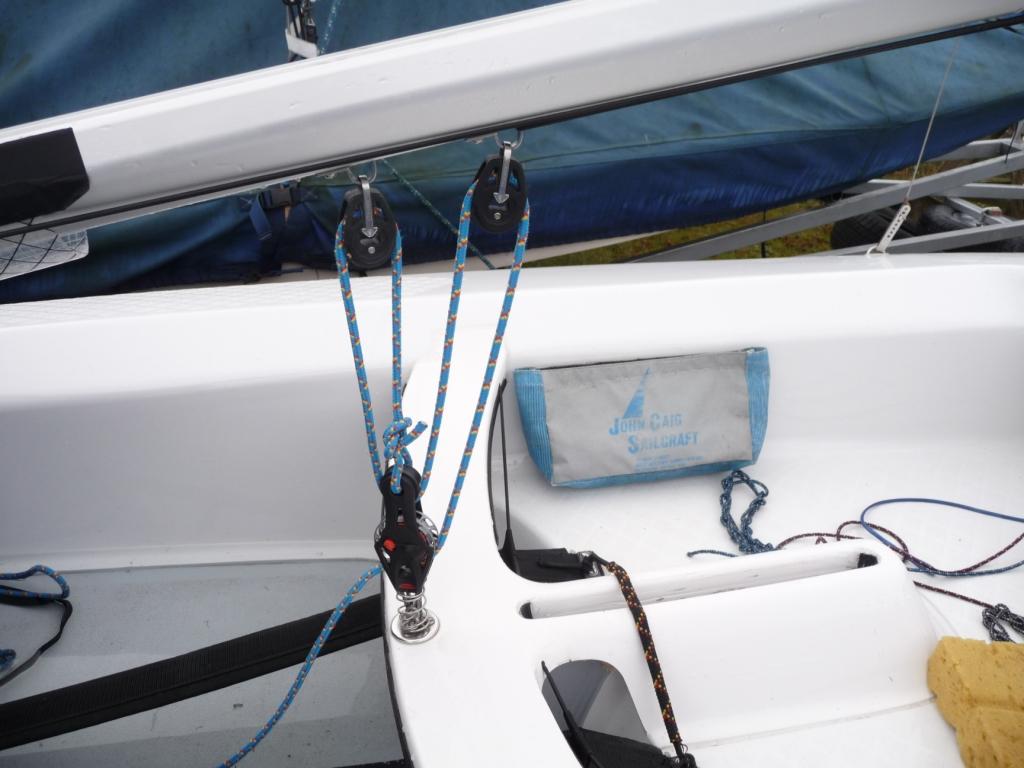
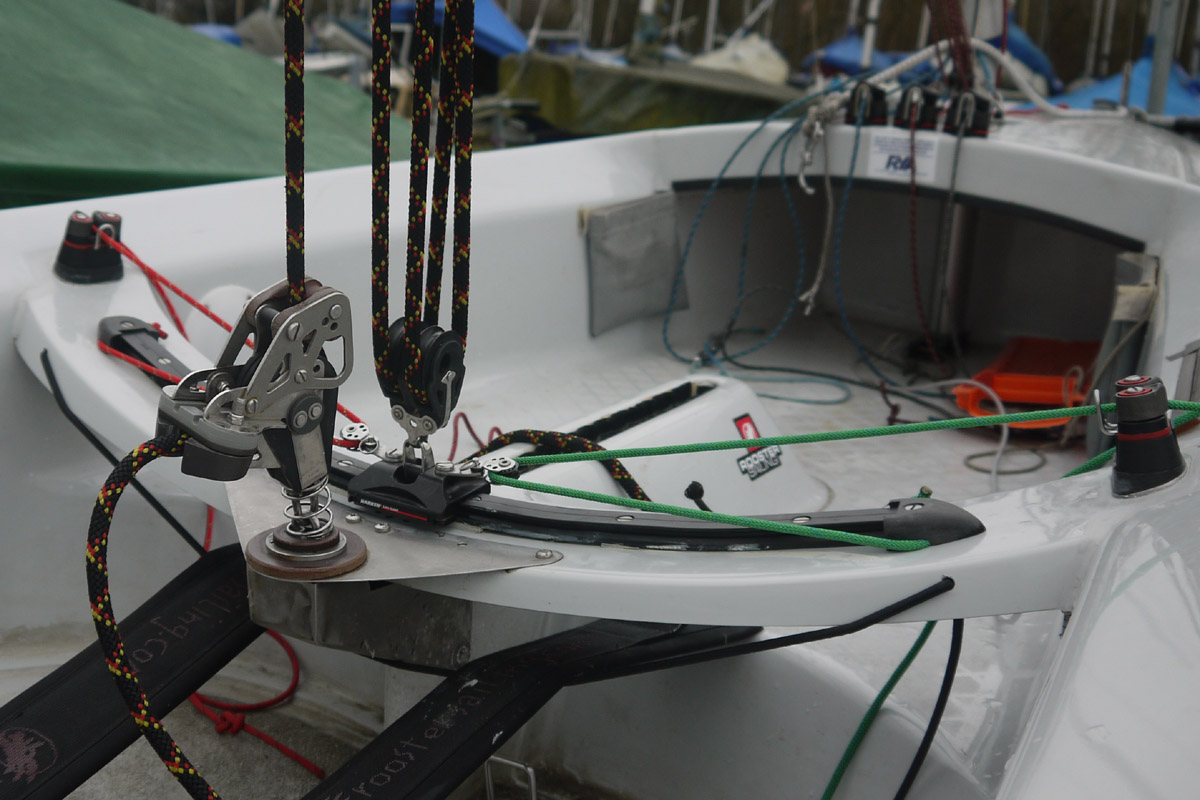
If you already have a FRP Rooster or Butler Streaker reinforcement of the thwart and it’s fixing in the boat I would say it is recommended but check with Beer BY or Dave Butler. Extra support for the thwart can be achieved as shown in photo 1, with a wire strop for example.
Photo 1:
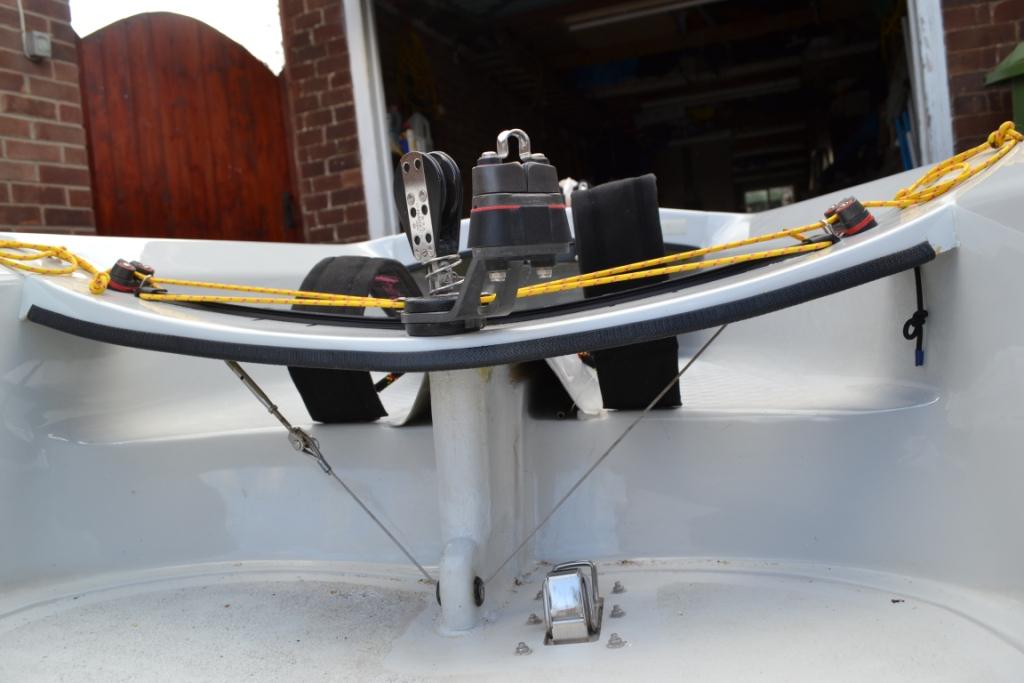
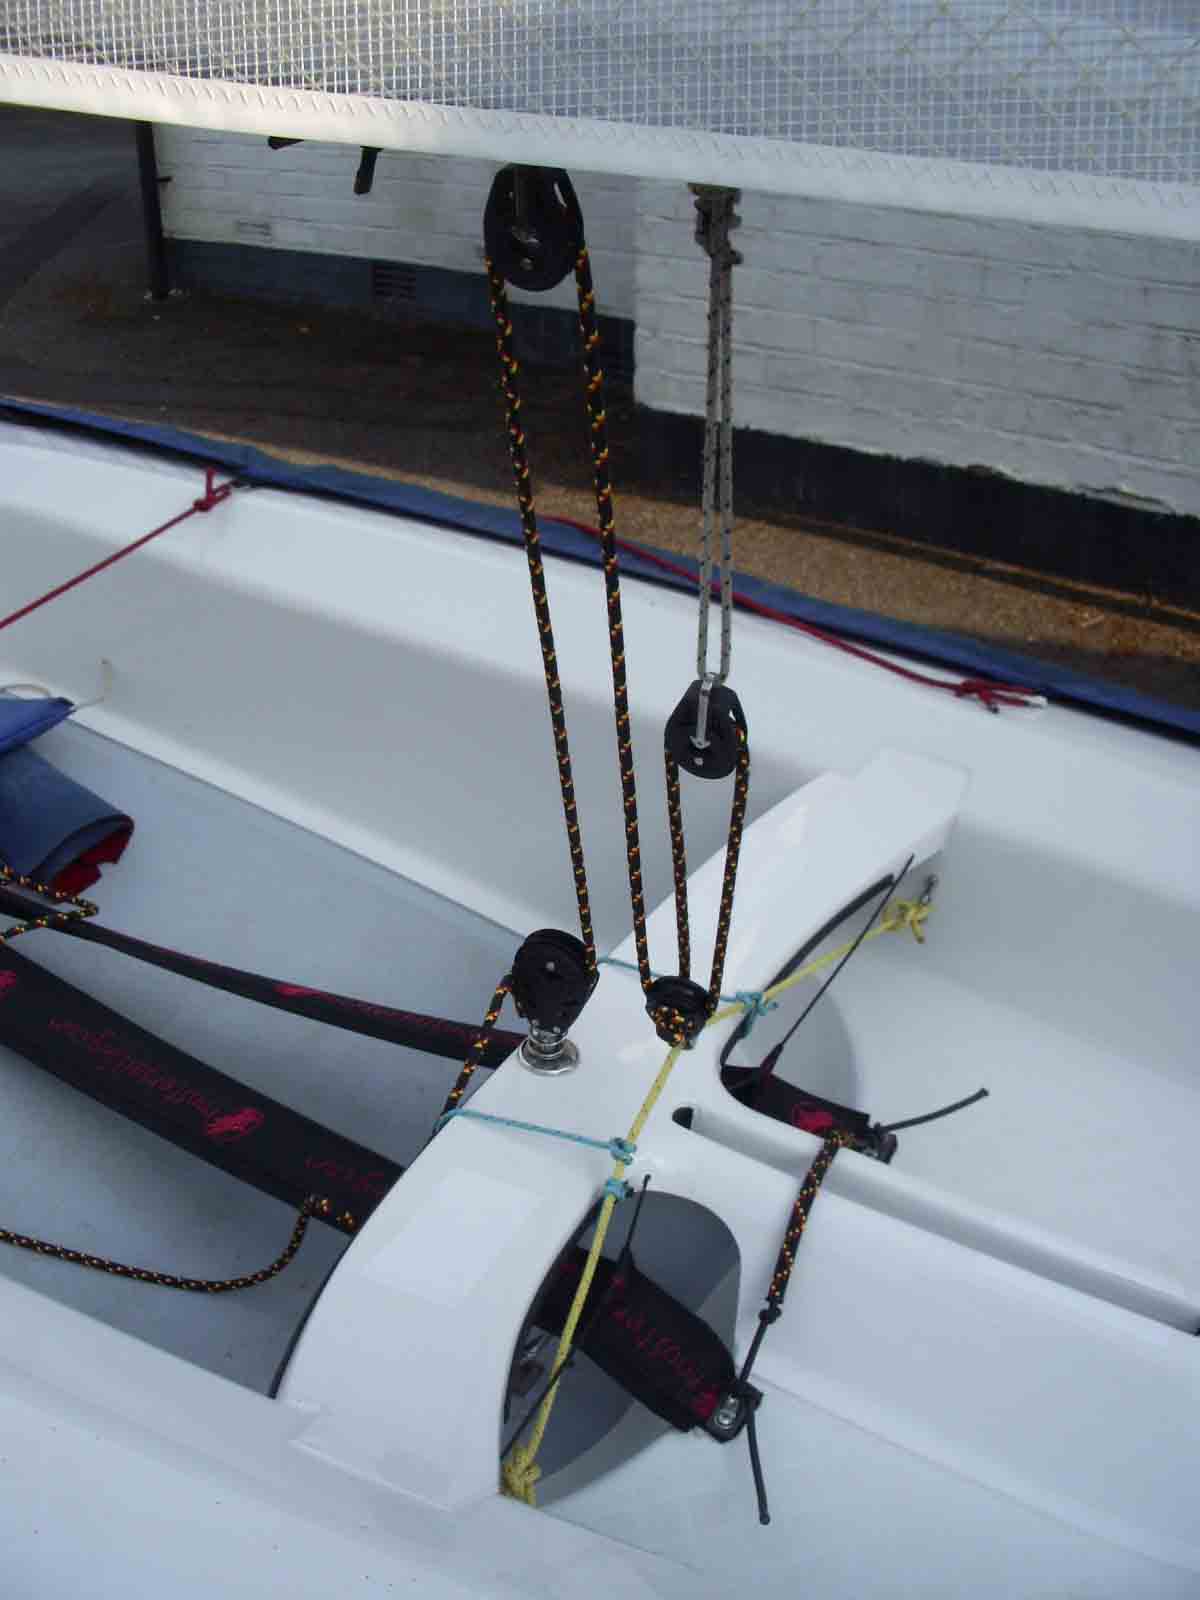
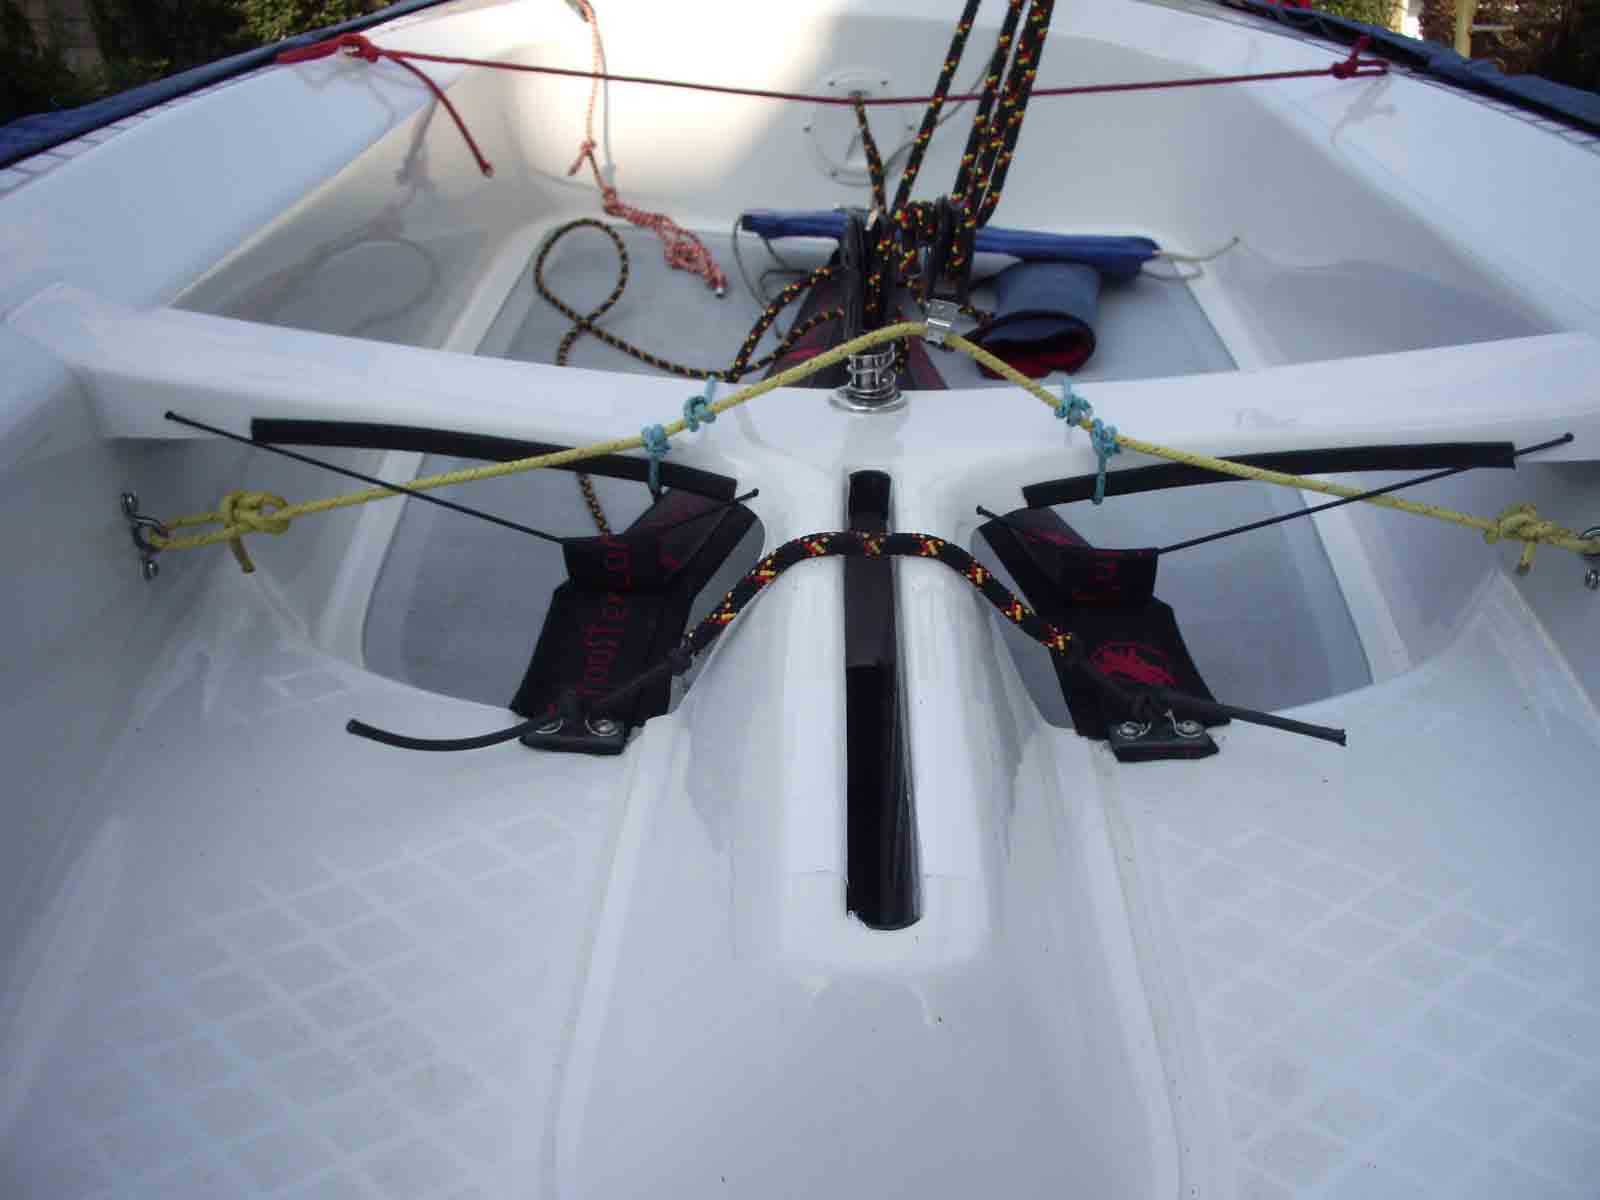
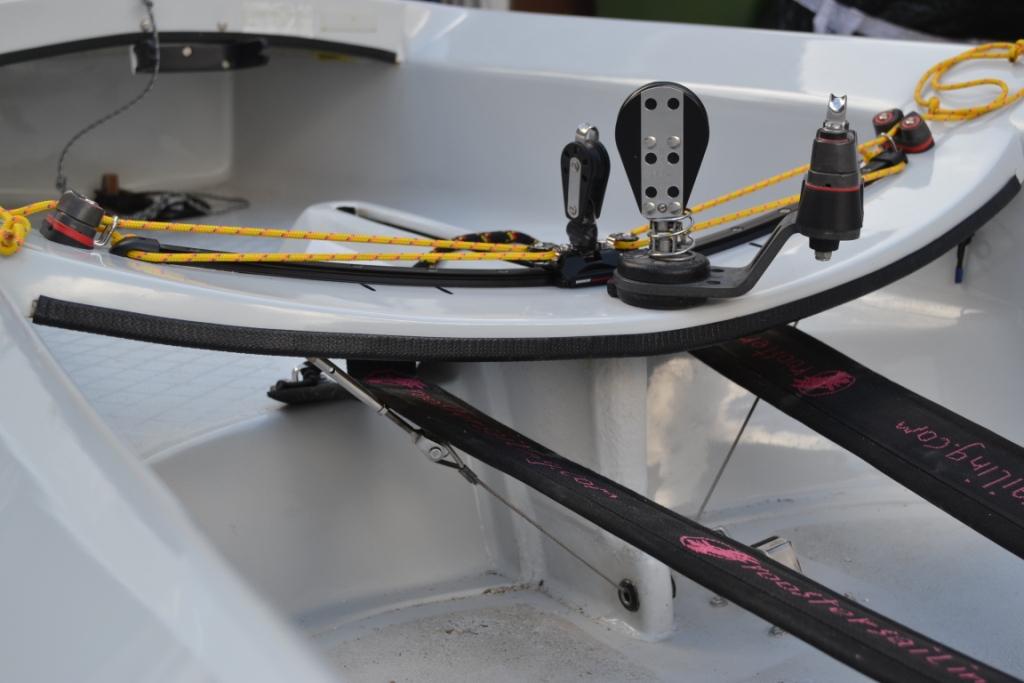
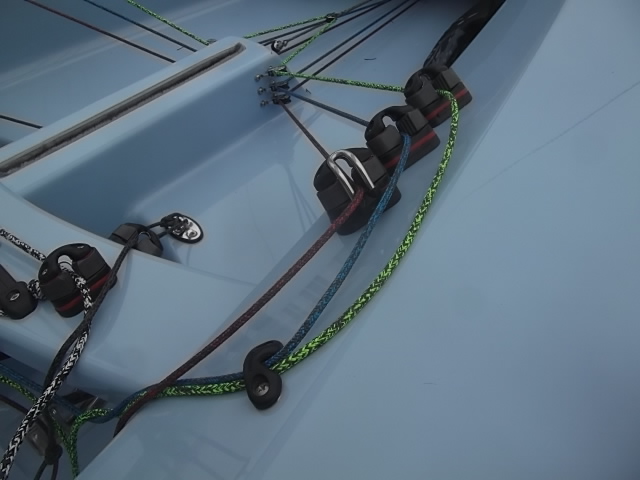
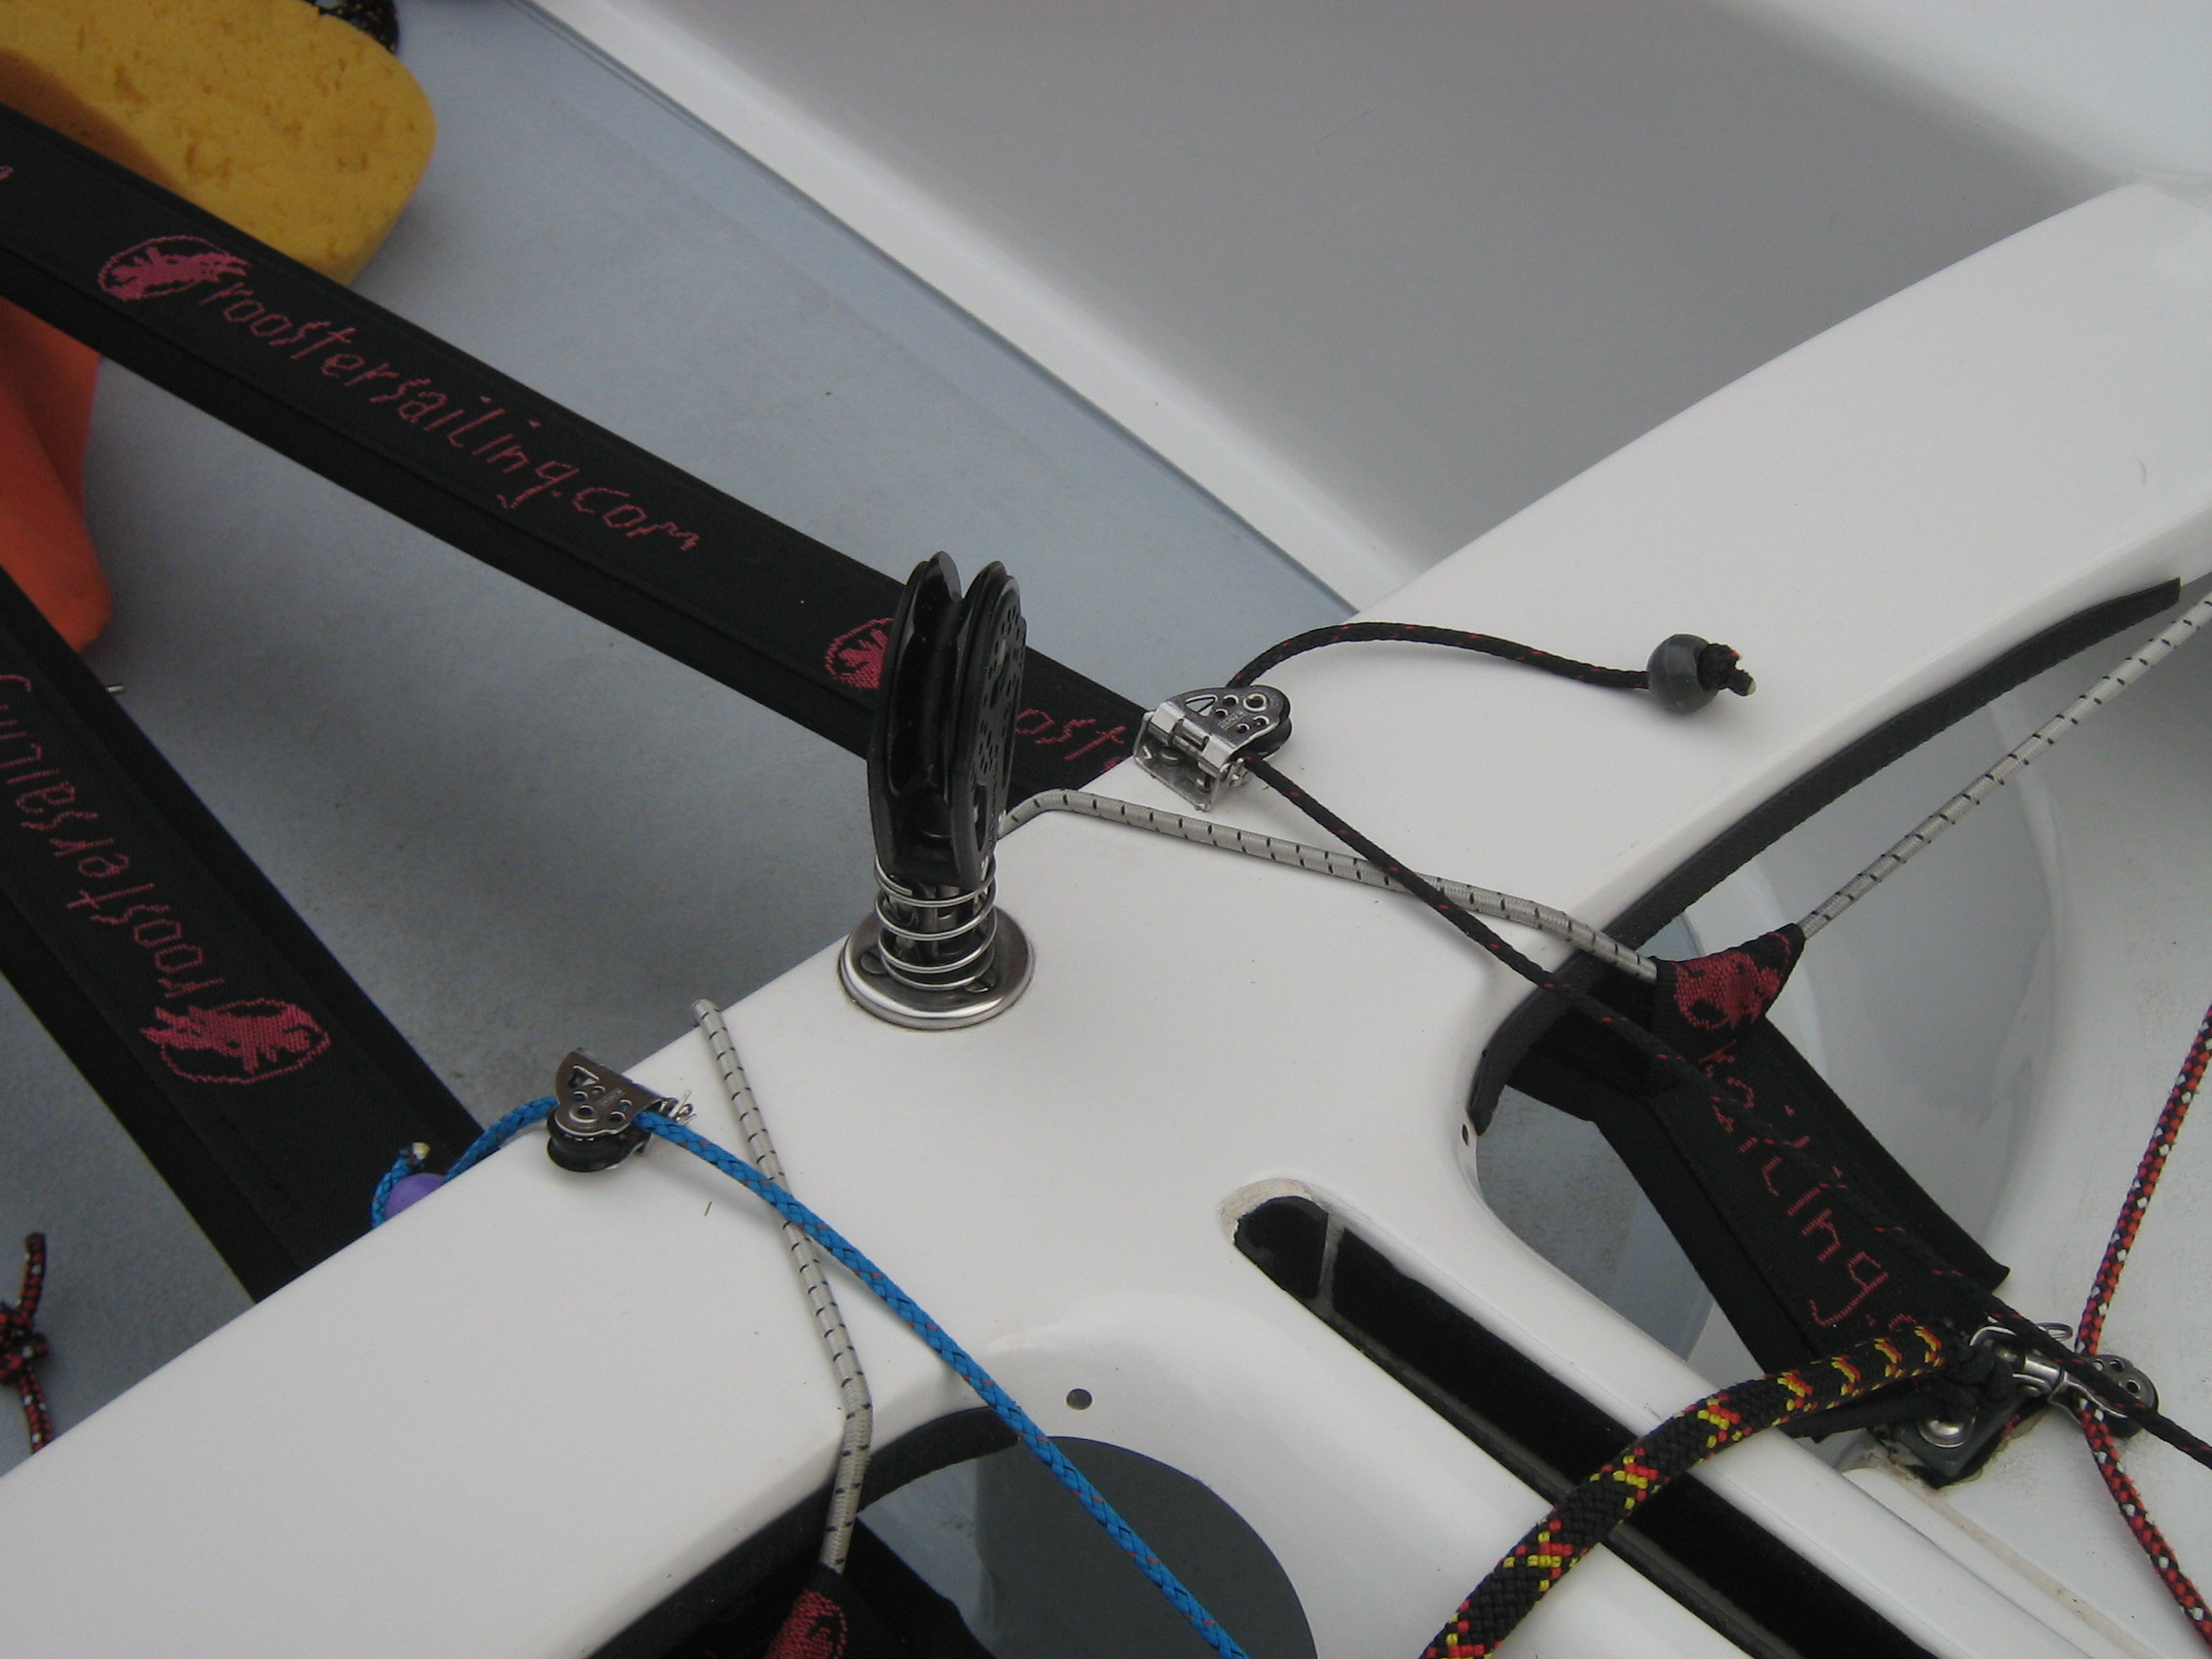
The standard track and traveller centremain set up is as shown in the pictures below; the track is positioned on the aft edge of the thwart (Photo 2), and the mainsheet jammer/ratchet block is positioned on a separate support on the aft edge of the dagger board case. The mainsheet system is 4:1 ratio. (Photo 3)
Photo 2:
Photo 3:
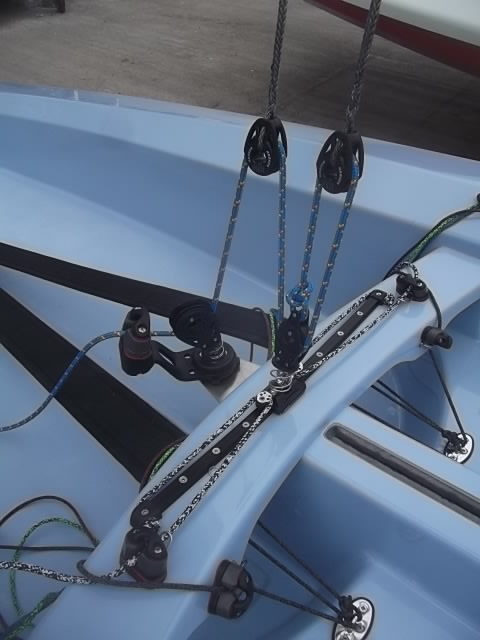
The track, when fitted to the thwart, ideally needs to be fitted on the very aft edge of the thwart. The main reason for this is so that when the boat is fully rigged the mainsheet blocks on the boom are as central (positioned equally from fore end of boom to aft end) as possible. The position of the Streaker thwart is too far forwards, hence this has the effect that the centremain sheet system also becomes too far forwards, which loses the natural leverage of the boom. You may feel this is acceptable but some sailors have resorted to increasing the number of purchases on the mainsheet to combat this lack of leverage up to 5:1. So what you may say? Well this also increases the length of mainsheet that you require, most of which when going upwind will be tangled around your feet and becomes quite a lot to pull in when coming around a leeward mark.
The other advantage of the track being on the aft edge of the thwart is that the mainsheet is less likely to get tangled up with a raised daggerboard.
With the track on the aft edge of the thwart the mainsheet jammer/ratchet block needs to be supported aft of the thwart. Rule 10.04 & 10.04a cover this.
10.04. The position and type of mainsheet Centre Jammer and/or Pulley/Ratchet Block for mainsheet lead to hand is optional.
10.04a. An optional mainsheet block support may be added to the aft side of the thwart and/or daggerboard case. Any such support shall not extend by more than 150mm into the cockpit from the aft side of the thwart.
It is possible for the mainsheet block to be attached to the floor.
Control lines for the traveller are optional as is the positioning of the cleats. But I would recommend that you attached the cleats to something solid, the cleats can easily be fitted to the thwart.
How you use the track and traveller centremain will be the subject of a future article.
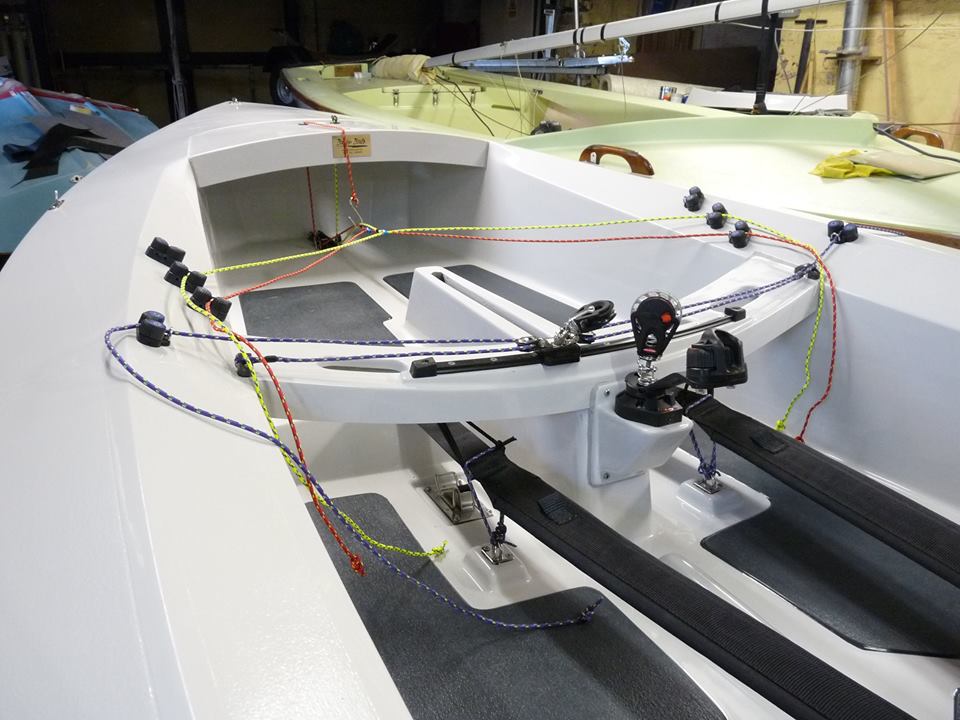
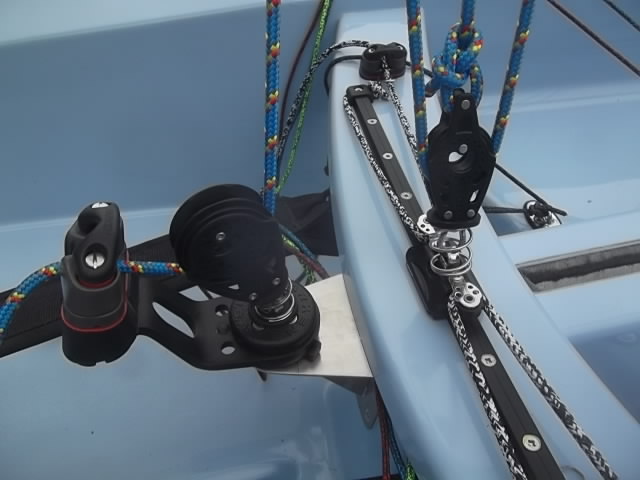
In the meantime, here are some more photos of Streakers that have been using centre mainsheet systems. They help to show the development of such systems in the class.
FIXED BLOCK
ROPE CENTRE BRIDLE (no track)
TRACK AND MAINSHEET JAMMER ON THWART
MAINSHEET JAMMER ON SEPARATE BRACKET
PROFESSIONAL FIT-OUTS
ALAN GILLARD
Tweaking your Rooster! - Part 1 by Alan Gillard
The Rooster Streaker has been around for a while now, they are proving to be well built boats which are easy to make go fast and look after. They are not difficult to set up either and hopefully through this article, owners of the Rooster Streaker will have a little more knowledge of how to achieve the faster settings.
Mast Rake.
I have never changed my mind since my early days in Streakers that 6120mm (241inch.) is the correct mast rake to go for. The mast rake is measured by attaching a long tape measure on your main halyard and hoisting to the top of the mast. Measure from the top of mast to the top of the aft tank at the transom.
The rake is adjusted by positioning the mast heel stops (pins) along the mast track. (The adjustment of the shrouds does not affect the mast rake).
I rig the boat up in the drive at home, its best on a windless day. Put the mast up, very loosely connect the shrouds/forestay, virtually just to stop them from flapping around whilst I do a bit of measuring. The boat should be set so the hull is level. Put a spirit level on top of the board case. The mast should be set so that the mast is touching the back edge of the mast gate and the heel of the mast is touching the aft pin in the mast track. Then measure the rake. Be careful not to bend the mast when tensioning the tape measure. To achieve the rake of 6120mm adjust the mast along the mast heel track forward or back. It may be that you have to use a block behind or forward of the mast to just get the mast in the right position. As a guide my mast is 254mm (10 inch.) forward of the ‘dry locker bulkhead’.
On original (Holt Kit) boats we used to measure from the ‘front of the board case’ to the back of the mast. The distance was 660mm (26 inch.). Obviously there is not a ‘front of board case’ to measure from in a Rooster. So I now measure from the dry-locker bulkhead (No.2 bulkhead). Transpose vertically downwards with a straight edge and mark on the false floor the position of the dry-locker bulkhead. The distance I then measure to the back of the mast is 254mm (10 inch.) This is a course measurement though, and is just a starting point to get the mast positioned to achieve a rake of 6120mm.
Make sure then that the mast is fixed fore and aft with the mast stops. There is not much point trying any of this if the mast heel is allowed to move about.
Setting the Shrouds/Forestay, Rig tension or lack of it.
As I already said the shrouds do not change the rake. With mast positioned so that the mast is tight against the back of the mast gate and the heel is against the back stop on the track, the shrouds can then be adjusted to supporting the mast for sideways bend. The forestay can then be adjusted to limit fore and aft bend.
The Shrouds should be pulled into the shroud adjusters both sides to the hole which you alone can just get the pin in the hole. This should not change the mast rake already achieved. Don’t go getting your mate to push the mast over to achieve a certain hole. Some of you will have noticed at sailing meetings I have a method of checking I have the right amount of slackness/tension in the shrouds. This I have found useful as I have changed boats quite a few times, and set up Tom’s boat for him.
On the shrouds wind a bit of electricians tape on the wire, about the same height as the black band/gooseneck level. Then I take a standard (but the same one every time) 24 inch bungee and hook this across the shrouds at black band level. The electricians tape stops the bungee from sliding upwards. I then measure across the shrouds where the elastic bungee has pulled them in. The measurement I look for is around 800mm, but any where within 50mm is I would say ok. I have the Selden section which is without doubt stiffer than the Rigel. So measuring my distance across my shrouds is 775mm, slightly slacker than that Tom has for a Rigel which measured 830mm. Again this is a fairly rough guide, and I don’t know the constancy of one 24 inch bungee to another.
The Forestay is again set using a shroud adjuster, (not a lanyard) and is pulled into the hole which I alone can easily just get it in. This means it is then a repeatable setting. I find with the Selden that in a blow I would let this off one hole, but otherwise for light and moderate winds leave it alone. Tom does the same for the Rigel section, forestay finger tight until its howling then let it off one.
There is a chance that the shrouds will fit in different holes in the shroud adjusters from port to starboard. On my Rooster the port shroud is in hole number 1 and on the starboard side the shroud is in hole number 3. It does not matter as long as the mast is upright.
The early Roosters Streakers had a mast gate which was not in the centre of the boat. This can have the affect of a side bend in the mast or the mast not being upright. I made myself a new gate block which compensated for the slight miss-alignment (5mm) of the deck pod. This issue has now been sorted by Rooster on all current boats. But I would also say that I feel the mast should be a good fit sideways in the gate.
I am sure that these settings can easily be applied to a Butler Boat’s Streaker’s as well.
Tweaking your Rooster part 2! - by Alan Gillard
I have had quite a bit of feed back from the 1st ‘Tweaking your Rooster’ article, mostly positive; then again it did ruffle a few feathers! As a result, the occasional question always pops up so I thought a 2nd article might cover these?
The Rooster Streaker which is built by the Boatyard at Beer are superbly built boats, I have sailed mine hard for three seasons, and basically there is not a mark on it. No cracks, no leaks and they are quick.
.jpg?1479736245421)
Shroud adjusters and Shroud hole position.
The Rooster Streaker has up-side down ‘U’ bolts through the gunwale to affix the shroud adjusters too.
When connecting the shrouds to the adjuster plates, the adjuster plates should be tight up against the under side of the U bolts. To achieve this I use a small wedge underneath the shroud adjuster whilst putting the shroud into the correct adjustment hole. This takes out the potential for there to be any unwanted slack in the shroud/shroud adjuster when setting up on shore. But take a look at the photo above just how slack my leeward shroud is when sailing?
When connecting the shrouds don’t be surprised to find the shroud position on one side of the boat is different to the other side. The Rooster hull sheerline is slightly different in height on one side to the other. So in my case the port shroud is in shroud plate hole number 3 whilst starboard is in hole number 1. I have checked my shrouds are the same length. None of this is detrimental to performance as the issues are easily overcome, but as long as you know.
Mast Gate pod and insert.
The mast similar to all boats should be on the centre-line of the Streaker. Fortunately the mast step is on the centerline. Where the issue comes is with the mast gate which can be in some of the early Rooster boats as much as 5mm off centre. New boats have this issue sorted out now so nothing to worry about, but worth knowing and checking that yours is central. I found that the mast would be touching on one side of the mast gate insert and there would be a gap on the other. It is possible to re-position the black insert inside the pod casting to overcome the off centre insert. I personally made myself a new insert which had the mast hole off set 5mm.
‘The Fit out’ Not to everybody’s tastes?
If you’re an ex-Laser sailor then the fit out as received from Rooster Sailing is just perfect, 3 cleats on the foredeck as per a Laser, all very familiar stuff. But if you are like myself; Laser sailing was never to my liking, I was never big enough or probably fit enough, and neither are the vast majority of Streaker sailors.
The Streaker though allows for much more diversification in its fit out, something me and other Streaker sailors like to take advantage of. Streaker sailors want that bit more and why not?
The main issue with the Rooster set up is that you can not expect to be able to adjust the kicker, outhaul or downhaul whilst sitting out. Not that is, unless you have long arms, the cleats are to far forward although they are easily operated. Whilst sailing the control lines drift to the leeward side of the boat which means the ropes don’t exactly come to hand easily either. It is a little easier in lighter wind’s when perhaps you can sit on the thwart and the cleats/control lines are closer.
Down wind in a blow though you don’t really want to be going forward to adjust the control lines depending where ever the loose ends are, better to stay upright than capsize looking for loose ends?
The initial answer of course is to tie the loose end of the 3 control lines to the toestrap elastic. In the end though; this is only a compromise which still does not allow you to adjust any of the controls for kicker, outhaul or downhaul whilst sitting out.
In my Rooster Streaker I recognized this issue very early and asked Rooster Sailing to install only 2 of the foredeck cleats. The kicker I was adamant I wanted back to both sides of the boat. This means to install the cleats on the side deck you need the backing supports installed by Beer Boatyard whilst the boat is being built. I suppose the installation of a hatch close to the thwart area so you can install cleats where you want them with backing support is still possible?

Kicker
I looked at my own sailing technique; the main control I adjust whilst going up wind is the kicker, so obviously I wanted the control line/cleats where I could easily adjust. The pull though also needed to be such that when pulling the kicker on, I could grab a good ‘hand full’ and pull loads on in one go.
A number of Streakers have the kicker coming straight from the mast area back to a cleat on the side-deck next to the helm, but when you want to pull some kicker on there is not enough room between the helms body and the cleat, so restricting the amount of kicker that can be put on in one pull.

My kicker allows me to pull it on until the control line comes over my shoulder and it is where I can get at it whilst sitting out on both sides of the boat.
I have always used a couple of triple blocks (currently a triple and a double) for my kicker. I have taken the pull direct from this using a splitter pulley back to two turning blocks for the control line which, are attached to the toestrap plates on top of the false floor. My kicker is only 10:1 which is a little short on power for most; but means I don’t need to pull quite as many yards of control line in. The more eagle eyed will notice the extended shackle that I use to connect the lower triple block to the mast. This fitting I have specially made by welding a short length of stainless rod between two shackles. The reason for this fitting is that it raises the lower triple block so that the kicker control line then clears the deck and deck cleats. But also it brings the lower triple block away from the mast area where the control lines for outhaul and downhaul descend.
The other important thing is to use some quality cleats with a front fairlead. You cannot expect performance if the cleats don’t work or don’t cleat easily.
Outhaul
The outhaul although I do adjust, this is mainly whilst going down wind. So I could compromise with the cleat on the foredeck but the loose end I lead back to a Flip-Flap block on top of the thwart. When I thought about it, the main change to the outhaul was at the beginning or end of a down wind leg. So I compromised not to bring the control line to either side of the boat but as said I lead the line back to the thwart close to the mainsheet block. Let’s face it your mainsheet hand whilst sailing, does come quite close to the mainsheet ratchet block on a regular basis, and the outhaul control line will always be just there. To let the outhaul off just grab the line in front of the Flip-Flap block and lift out of the cleat, pull some on you can either; grab the line from behind the Flip-Flap block and pull from any angle, or you can still pull on from in front of the Flip-Flap block. Whatever there is no need to go forward to find the control line?
The outhaul control line (the blue one in the photos) ties off through the deck eye that the turning block is attached to on top of the black mast insert. You can see that the lead line from the boom has a turning block attached that the blue control line goes around, giving that simple extra purchase.
Downhaul
This is the control that is very often overlooked and yet has a big effect on the fullness of the mainsail. Because it is overlooked people do not realize that you need plenty of purchase. I use a 6:1 purchase which is really just simple 3:1 block and tackle. It doubles through the pulley on the luff of the sail, before tying off on the side of the mast. (The black ropes in the photos). I scrapped the bits of rope ‘Laser style’ wrapped around the kicker attachment to hold a block, to fixing my blocks on the Black mast gate support, and added an extra block for more purchase. This also has the added advantage that the downhaul is solely attached to the boat when de-rigged, which means the ropes are not daggling from the mast when travelling to open meetings.
I still use the deck cleat on the foredeck but like the outhaul I lead the loose end back to a Flip-Flap block on the thwart.
Halyard storage.
I use one of the nice little Pinnell & Bax halyard bags stuck to the side tank with the Velcro supplied. So much tidier than stuffing your halyard behind an elastic bungee around the mast or allowing it to float around under the foredeck?
Dagger-board.
I use a wood dagger-board manufactured by Dave Butler; main reason being at the time I bought my Rooster, I could not do the Velcro in the board case job and get a Rooster Board in there as well. But Rooster has changed to a new Dagger-board and is installing the Velcro as well. There is a whole article around dagger-board protection on the Streaker website, so I won’t go any further.
Rudder assembly.
The Rooster rudder assembly which uses the Seasure stock is spot on. This is the only stock that does not drag in the water when sailing. All the others do. The overall assembly is also very light weight.
I change the position of the rudder blade in the stock (I re-position the pivot hole in the rudder blade for the rudder bolt) though so I can get a little bit of forward rake on the rudder blade. This also allows me to put a rubber stop in the front of the stock so that when the blade is pulled fully down the leading edge hits my rubber stop and not the alloy of the stock, which would eventually damage the rudder blade.
When fully down the rake of the rudder on the Streaker I have so it is parallel with the aft face of the transom, I find this reduces the amount of weather helm on the boat and is easier to control in a blow. You can always sail with the blade vertical in lighter winds to give you a little more feel.
Always tacking on the lifts…
Alan Gillard.
Class Sponsors